This Java tool provides a simple graphical user interface to install and launch ProtProtocol images.
Installation
- docker-launcher requires Java to be installed. You can download Java from http://www.java.com
- You also need to have Docker installed on your system. For help with this step see our docker installation manual
- Download the current version from the releases.
- Unpack the zip file to any directory
- Simply launch the docker-launcher-[VERSION].jar file (double click or use `java -jar /path/to/docker-launcher-[VERSION].jar)
Usage
Image Download
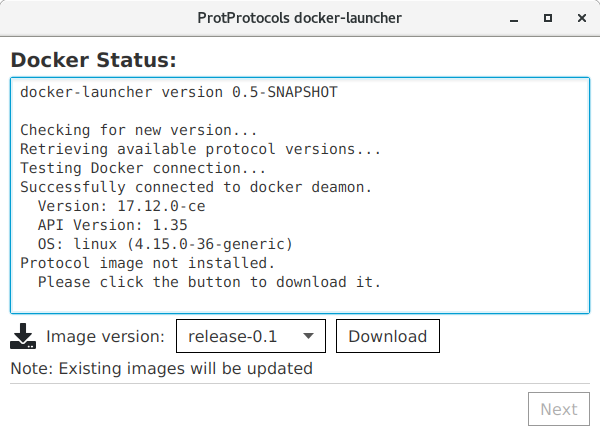
docker-launcher has only two screens. In this first screen, docker-launcher makes sure that Docker is running and that it can connect to the Docker daemon. In case the connection fails, a detailed error message is displayed in the text pane telling you how to solve the issue. In case it still does not work, contact us through the mailing list.
Additionally, docker-launcher tests whether any of the supported ProtProtocol images is already installed. If this is not the case (as in the screenshot) you can simply download a specific version by selecting it from the drop-down menu and clicking the “Download” button. Note: Depending on your internet connection, the download can take up to 40 minutes.
As soon as the download is complete, or if an image is already present, the “Next” button is enabled and you can procede.
Launching an image
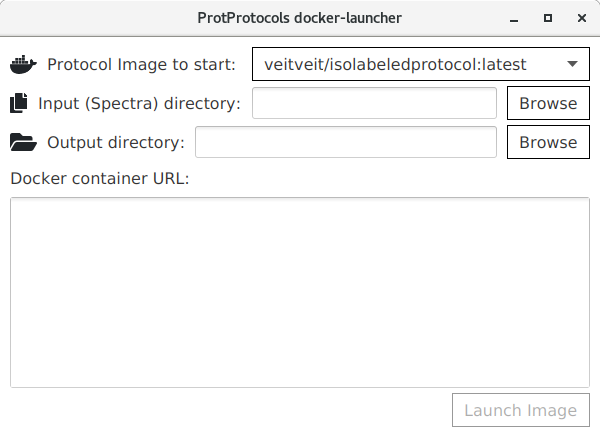
The second pane has three input fields:
- The protocol image to start. The drop-down fields lists all installed images
- The input directory. This is the directory that should contain all your MGF and FASTA files.
- The output directory. Here, the image will place all result files.
Once you selected the input and output directory, the “Launch Image” button is enabeled and you can run the Docker container.
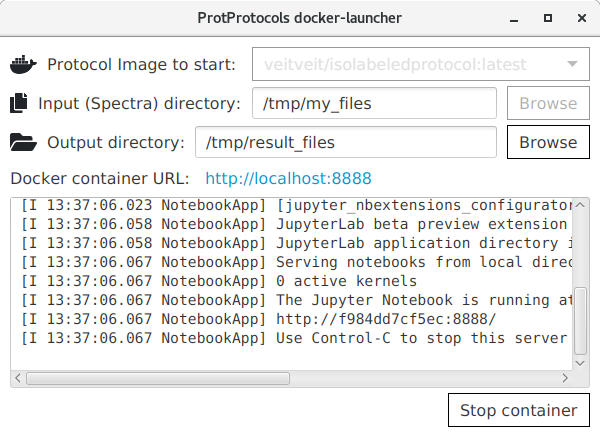
When the image is running, the window will display the Jupyter notebook’s URL. Additionally, docker-launcher will try to open a browser automatically to open the notebook. The textbox displays the output of the Jupyter notebook server from the docker container. This is mainly done for debugging purposes. The complete analysis is run through the browser.
Once the image is started, you can stop (ie. shutdown) the container by clicking the “Stop container” button. Stopping a container destroys all the data and terminates any running process within this container. Only the data in the defined input and output directory will remain.
Warning: On Windows 10 a known Docker issue can sometimes prevent folder sharing. This is recognized by docker-launcher and the image is started without shared folders. This has two effects: 1) You have to upload your input (MGF and FASTA) files into the image using the Jupyter web interface (opened automatically) and 2) that all result files will be deleted when you stop the container. Therefore, you must manually download all result files before stopping the container using the Jupyter web interface.